Creating your school
The most efficient ways to add a new school to your account.
For quick context, a school can be one of the following stages:
- Pre-school
- Kindergarten
- Elementary
- Junior High
- Senior High
If your institution includes more than one school stage, you’re very likely running a group of schools.
Institutions like this typically have names like: Acme Group of Schools, Acme International Schools, or simply Acme Schools.
Cosine considers each of these stages a school in itself. So, if you operate a group of schools, you must add the schools individually.
Note: Currently, Pre-schools are not supported. We’ll update this guide when that changes.
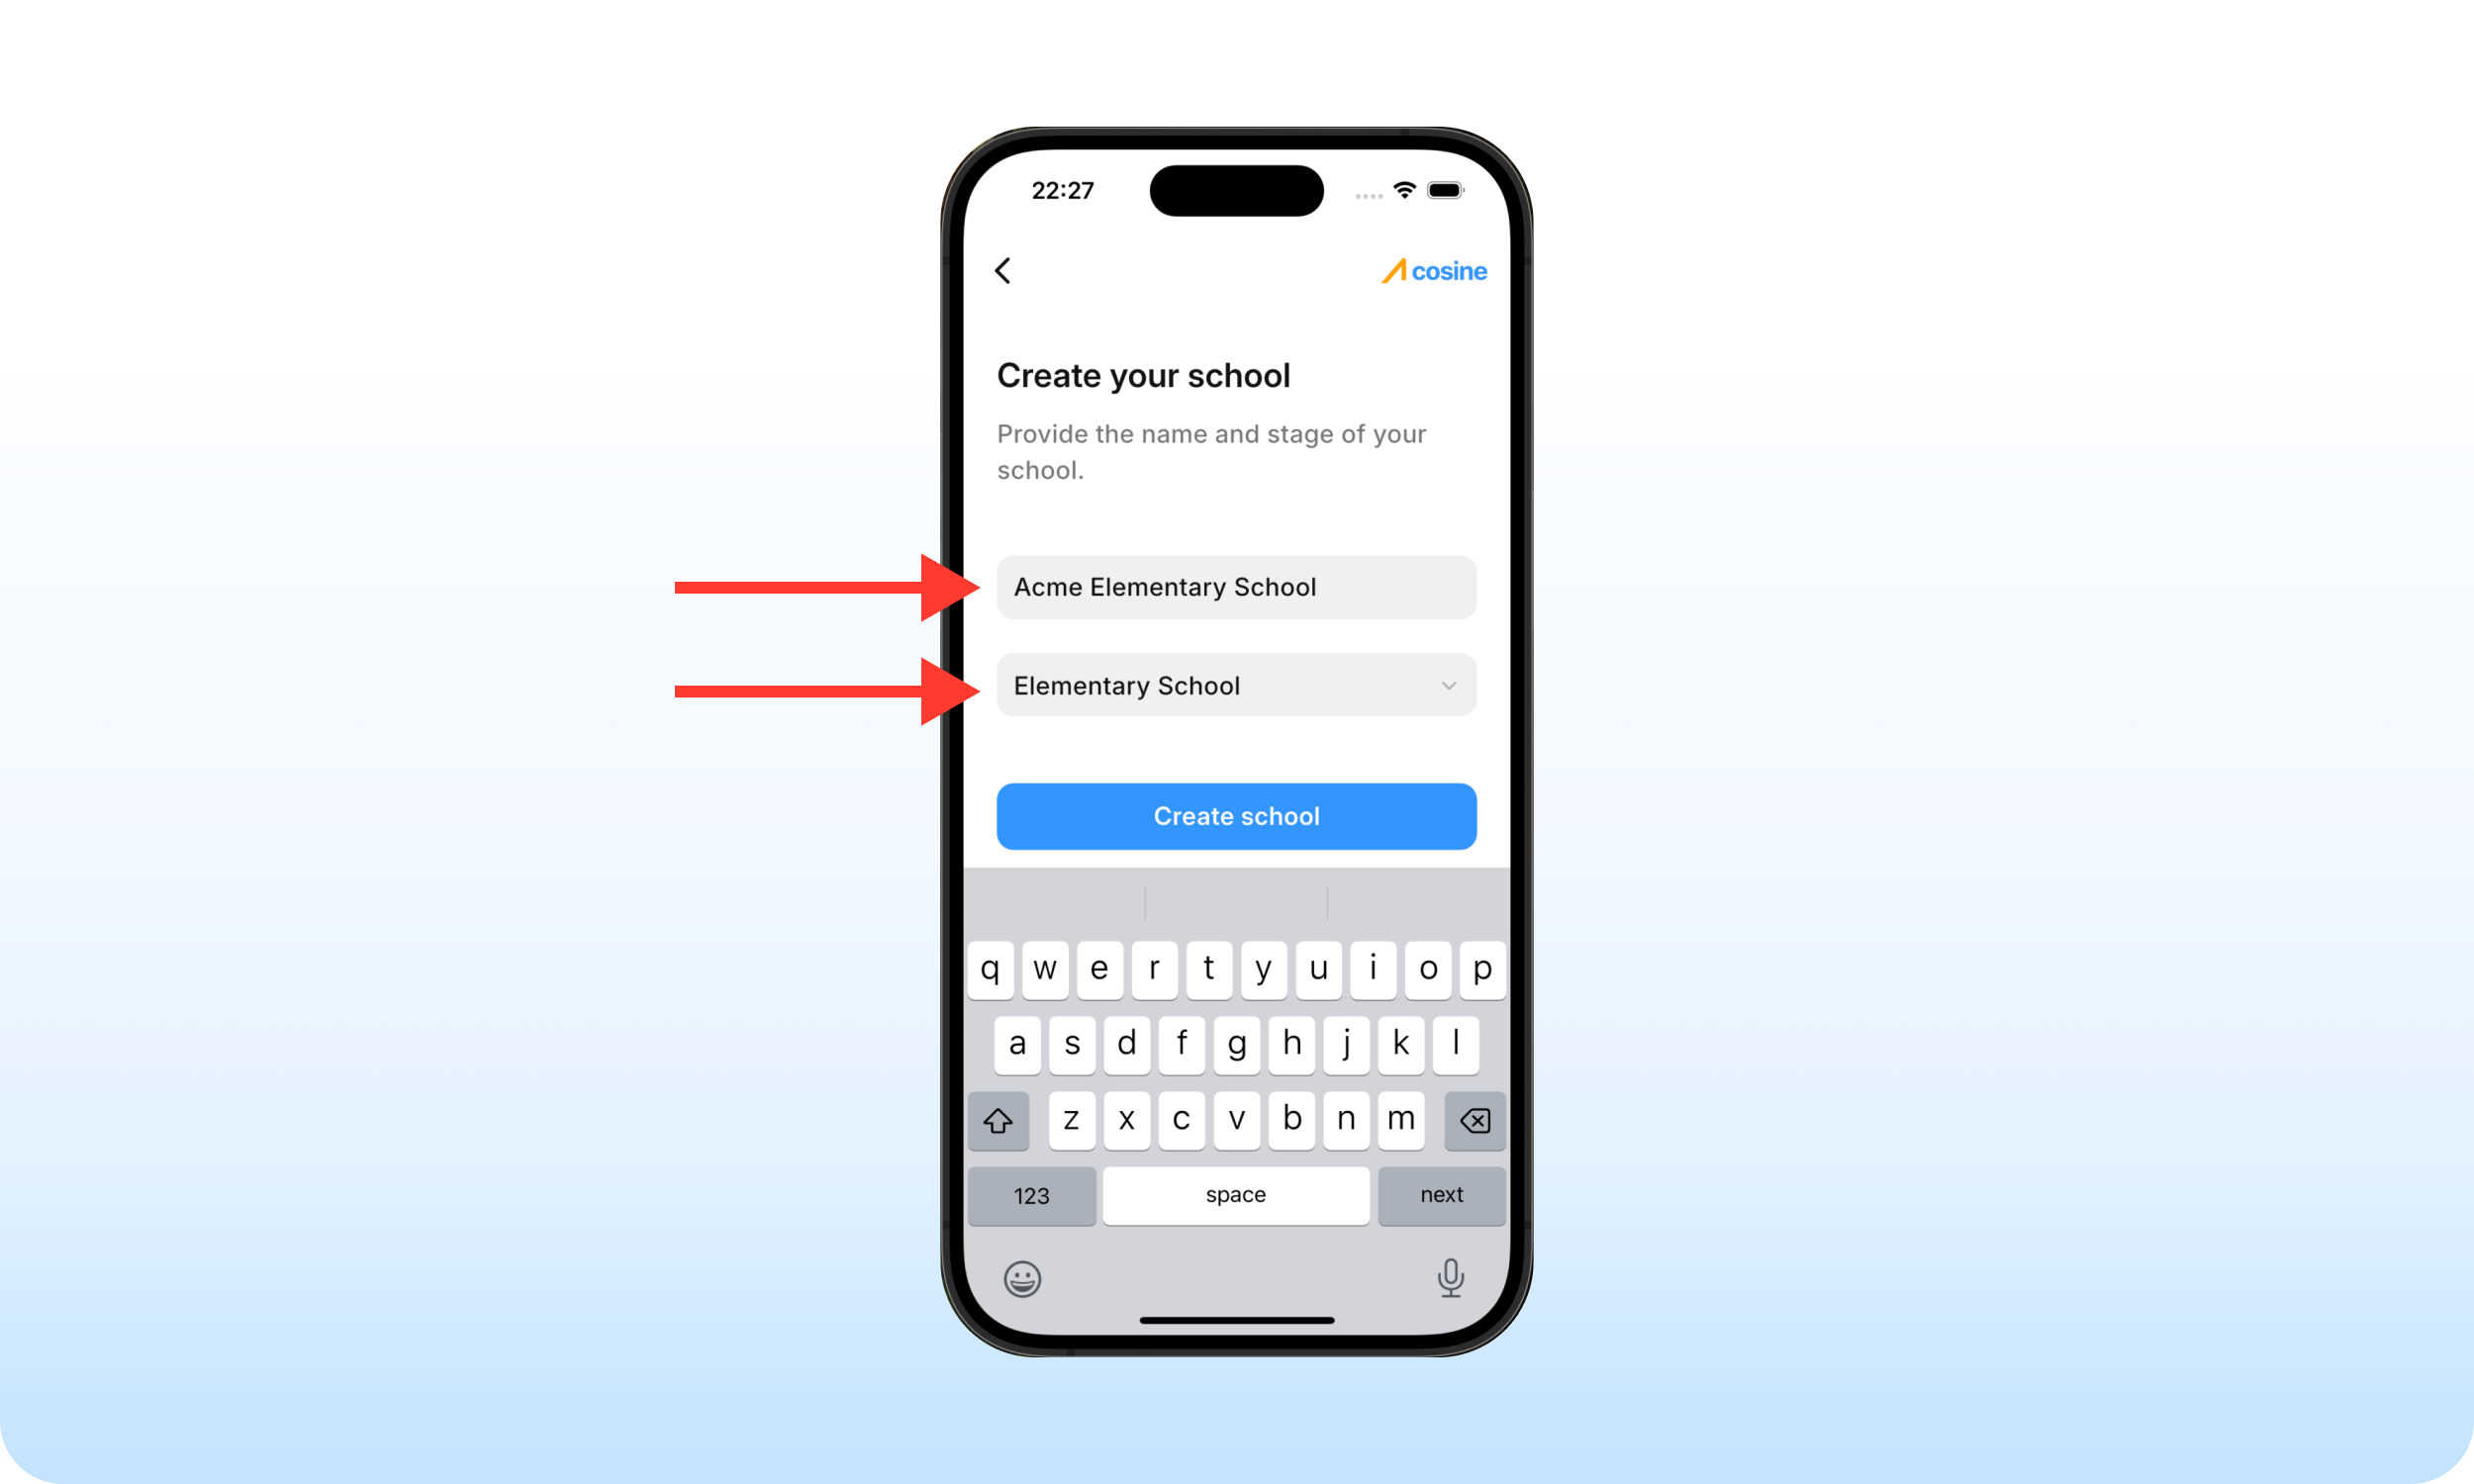
Naming your school#
We understand that your school may already have an officially registered name.
However, if you operate a group of schools, you may want to name each school a little differently.
We recommend naming schools according to your government approval documents. This is vital for approval verification purposes and to avoid confusing the staff and parents connected to your school.
For example, if your institution’s name is Acme International Schools, your government approval documents (e.g. from the Ministry of Education) would typically specify the school units being approved. So, add the elementary school as Acme Elementary School (according to government approval documents).
Following this naming convention makes it easy for everybody in your school to instinctively identify which school unit (among your group of schools) they are logged into.
Initializing your academic calendar#
Once you’ve created your school, you’ll see a checklist of setup processes. The first item is to set up your academic calendar.
You only do this once. Cosine will automatically sync future academic schedules with this initial set up.
While we believe this stage of the school setup is intuitive, here’s how to properly initialize your academic calendar.
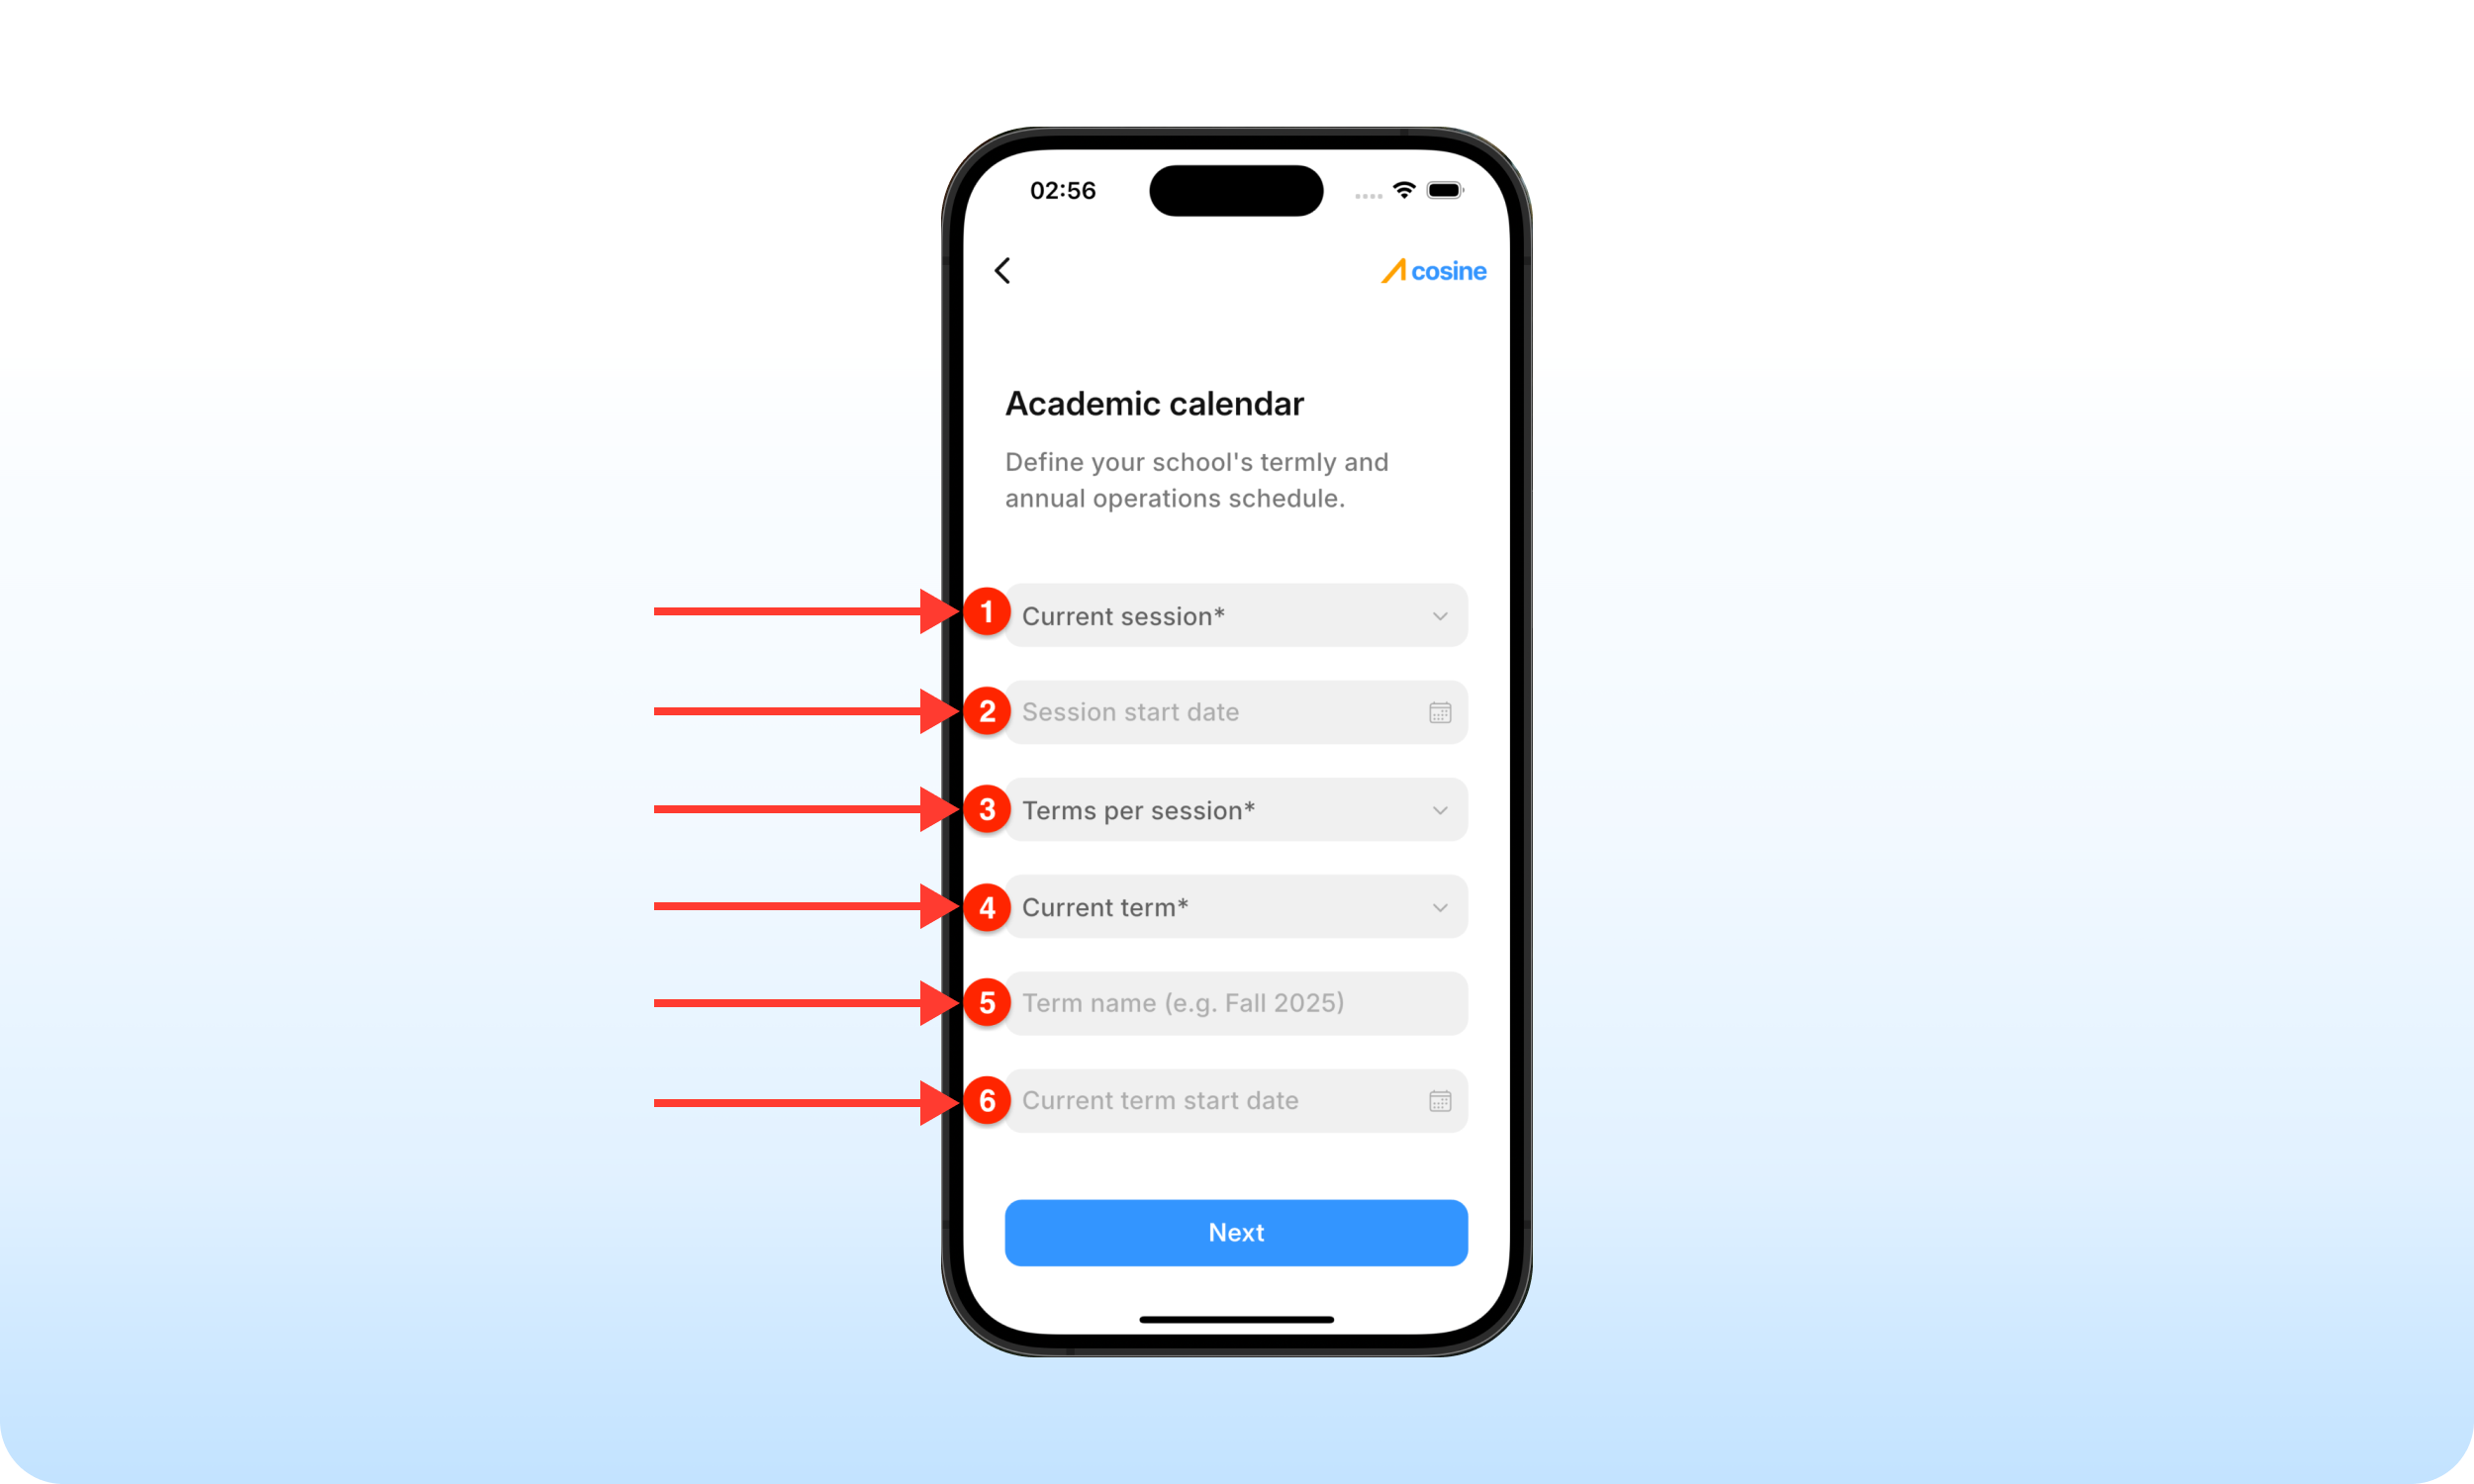
1. Current session:#
Choose the option that best describes your current academic session. If the session has ended, select the upcoming session.
2. Session start date:#
Select an estimated date for when the current academic session started (or will start). This value doesn’t need to be precise.
3. Terms per session:#
Specify how many academic terms are included in your academic session.
Your choice here will have a significant impact on how your school operations are automated.
Continue reading to understand why this field is critical and how to properly choose a term count.
4. Current term:#
Select the term that is currently running. If the term has ended, select the upcoming term.
5. Term name (optional):#
Give the current term a name. We recommend the American term naming convention, which uses seasons and year (e.g. Spring 2025).
This is solely for your internal tracking purposes and doesn’t affect the app’s functionality in any way.
6. Current term start date:#
Select the estimated date for when the current term started (or will start). While this value doesn’t need to be precise, a term cannot start before the session.
If the current term is the first in the session, the start date can be the same as the session start date.
How to choose term per session and why it matters#
Around the world, academic calendar structures vary. The trimester (3 terms) structure is the most common.
Cosine also supports schools that operate semester (2 terms) or quarter (4 terms) structures.
How do you select the right option?
The number of terms per session must be equal to the number of times your school generates report cards for ALL your students in a given academic session.
This means that, if your school runs three terms plus additional summer classes, you should choose “3 terms.”
Do NOT count the summer classes as a term of its own.
Why does this matter?
At the end of each academic term, Cosine automatically compiles the data recorded for each student into an end-of-term report, delivered to their respective parents.
These reports contain all academic interactions for every student in your school, with accompanying analytics.
By recognizing summer classes as a term in and of itself, Cosine will generate reports for those summer classes.
Since summer classes are not known to be mandatory, there will be cases of missing data logs for students that do not opt into the summer lessons.
These missing data logs may break the integrity of your school’s data structure and, consequently, disrupt your automations in the future.
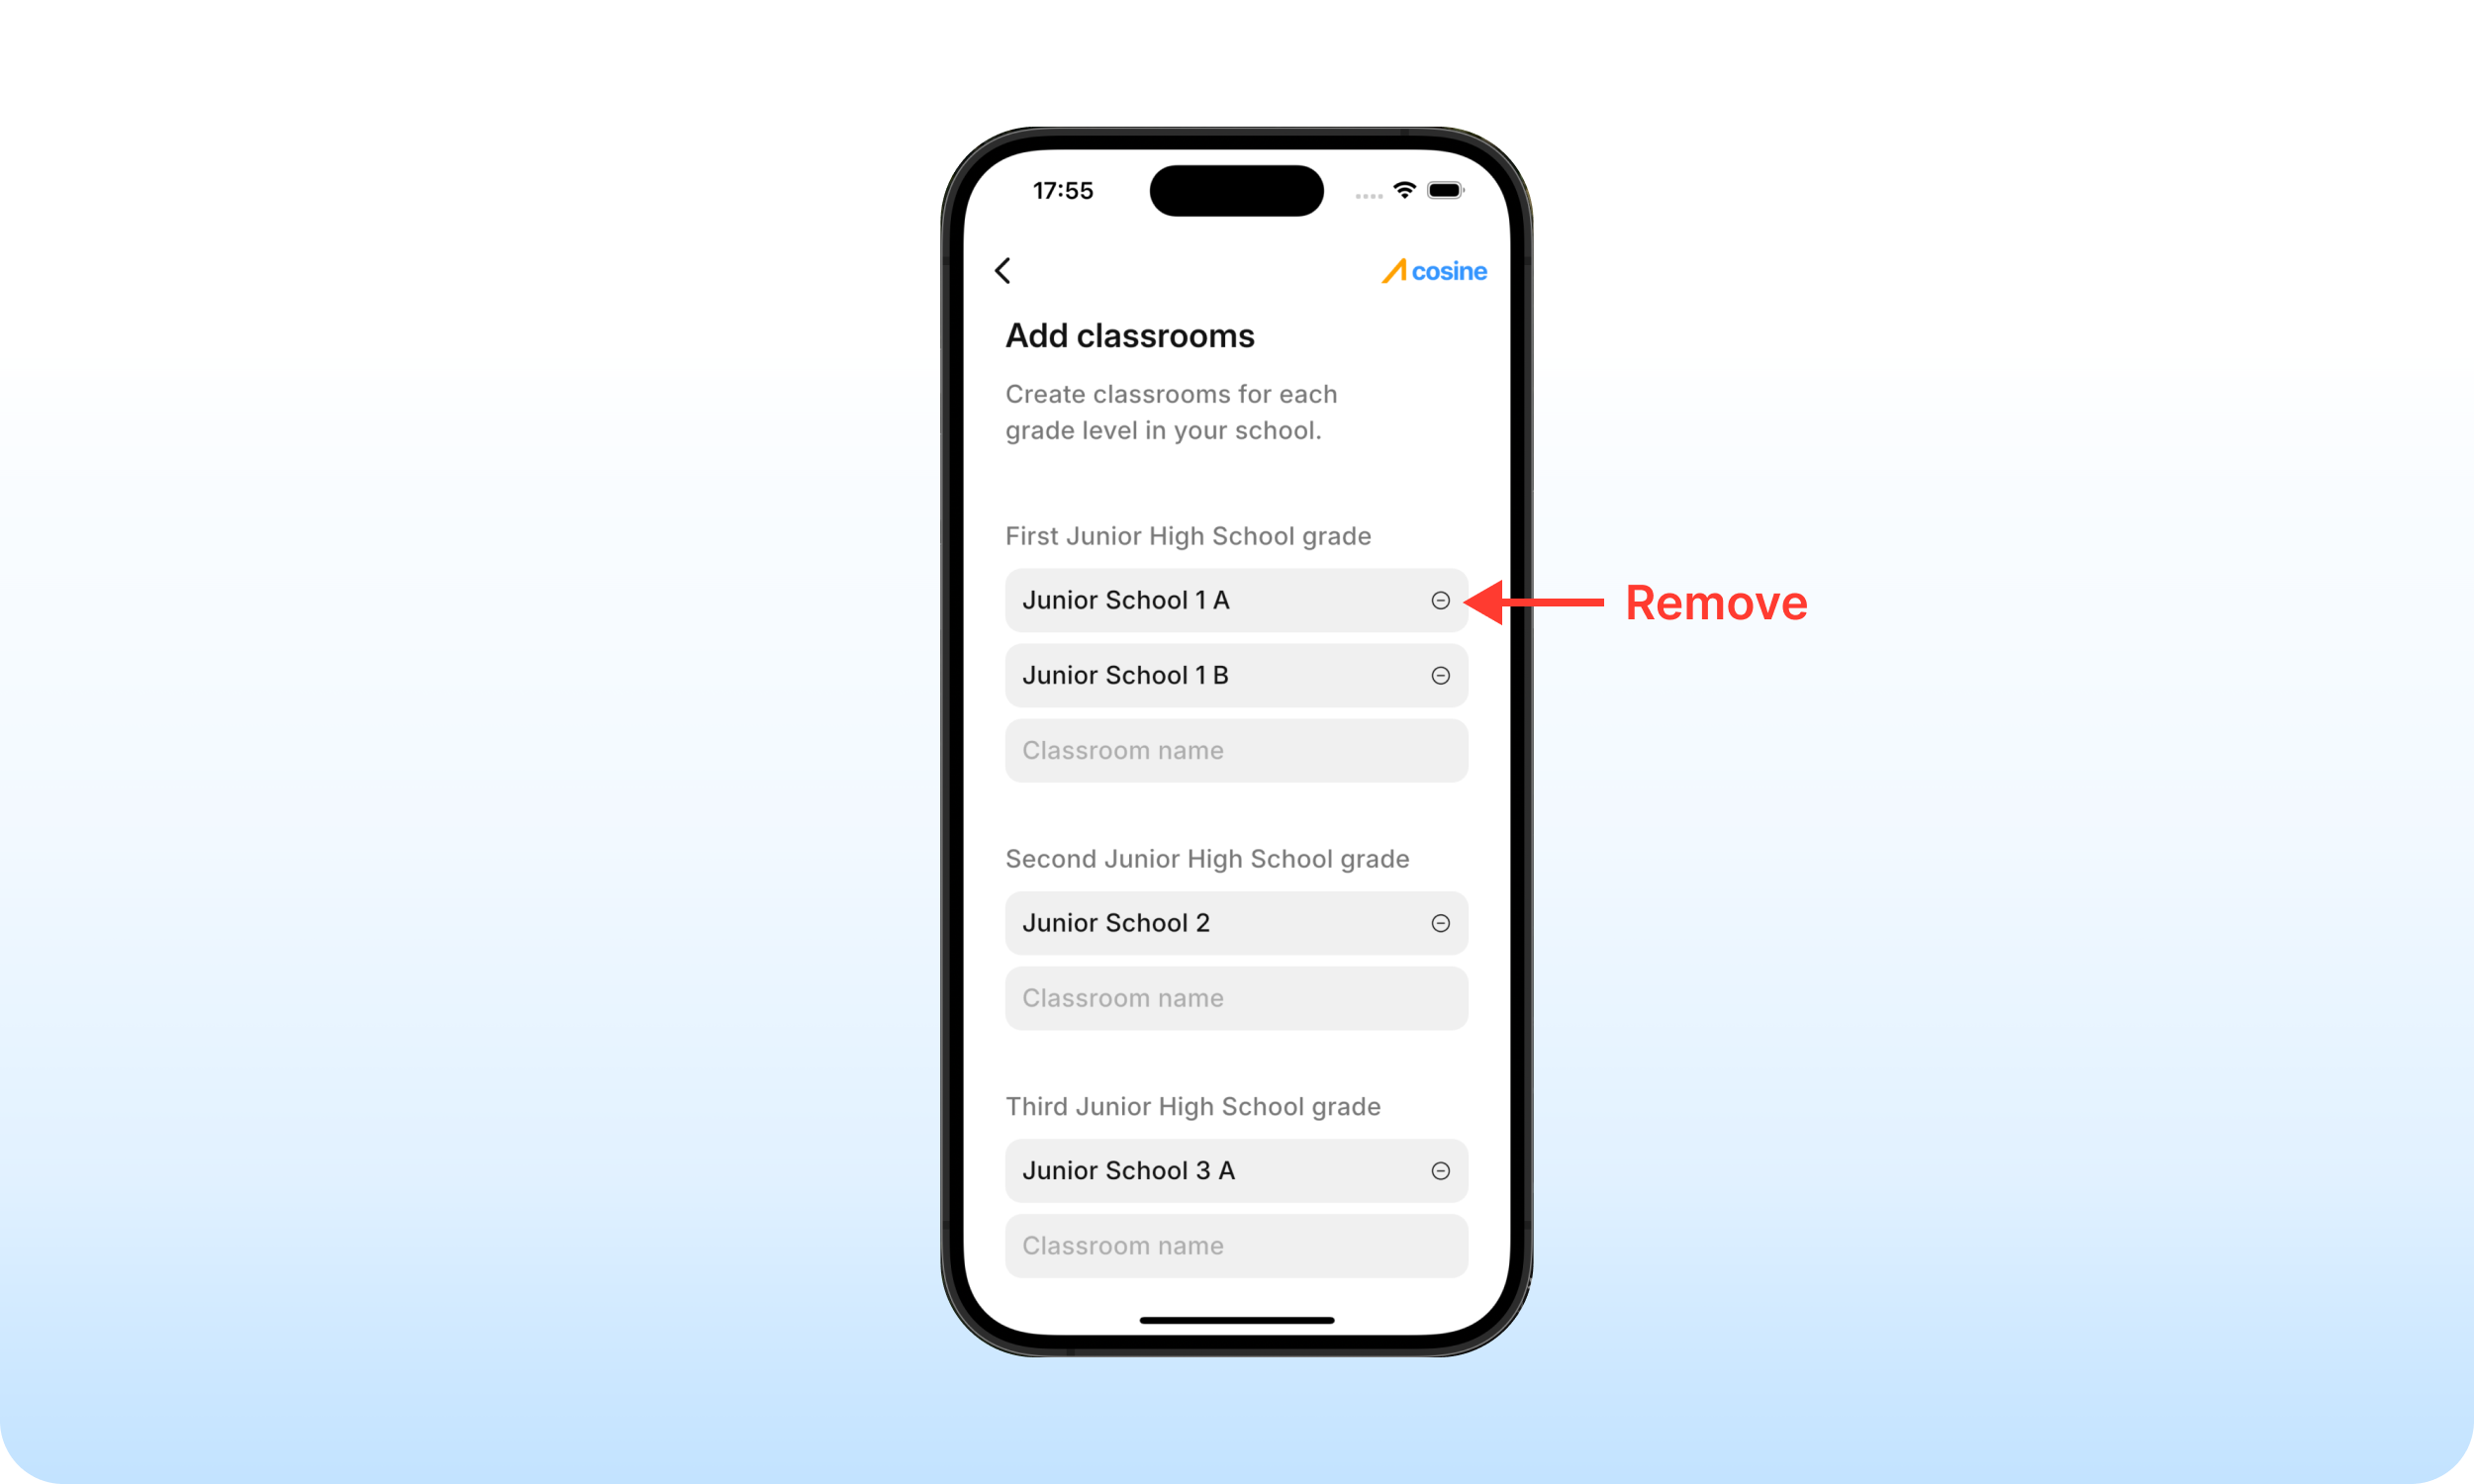
Adding your classrooms#
After initializing your academic calendar, the next step is to add classrooms to your school.
Depending on the stage, your school will include 2 to 6 grade levels.
- Kindergarten = 2-3 grade levels.
- Elementary = 5-6 grade levels.
- Junior high school = 3 grade levels.
- Senior high school = 3-4 grade levels.
You can add multiple classrooms to each grade level.
This allows a large school with partitioned classrooms (e.g. Grade 5A and Grade 5B) to replicate their traditional classroom setup and assign teachers to their corresponding classrooms.
Creating your school’s default curriculum#
After adding classrooms to your school, the next step is to define the subjects that are taught in your classrooms.
The Default curriculum, created during school setup, should contain only subjects that are mandatory for ALL students in your school.
Subjects that one or more students can opt out of should not be included in the default curriculum.
After completing the setup, you’ll have the option to create specialized curriculums, each of which may include optional/elective subjects.
The Default curriculum typically contain general knowledge subjects like English Literacy, Mathematics, and others.
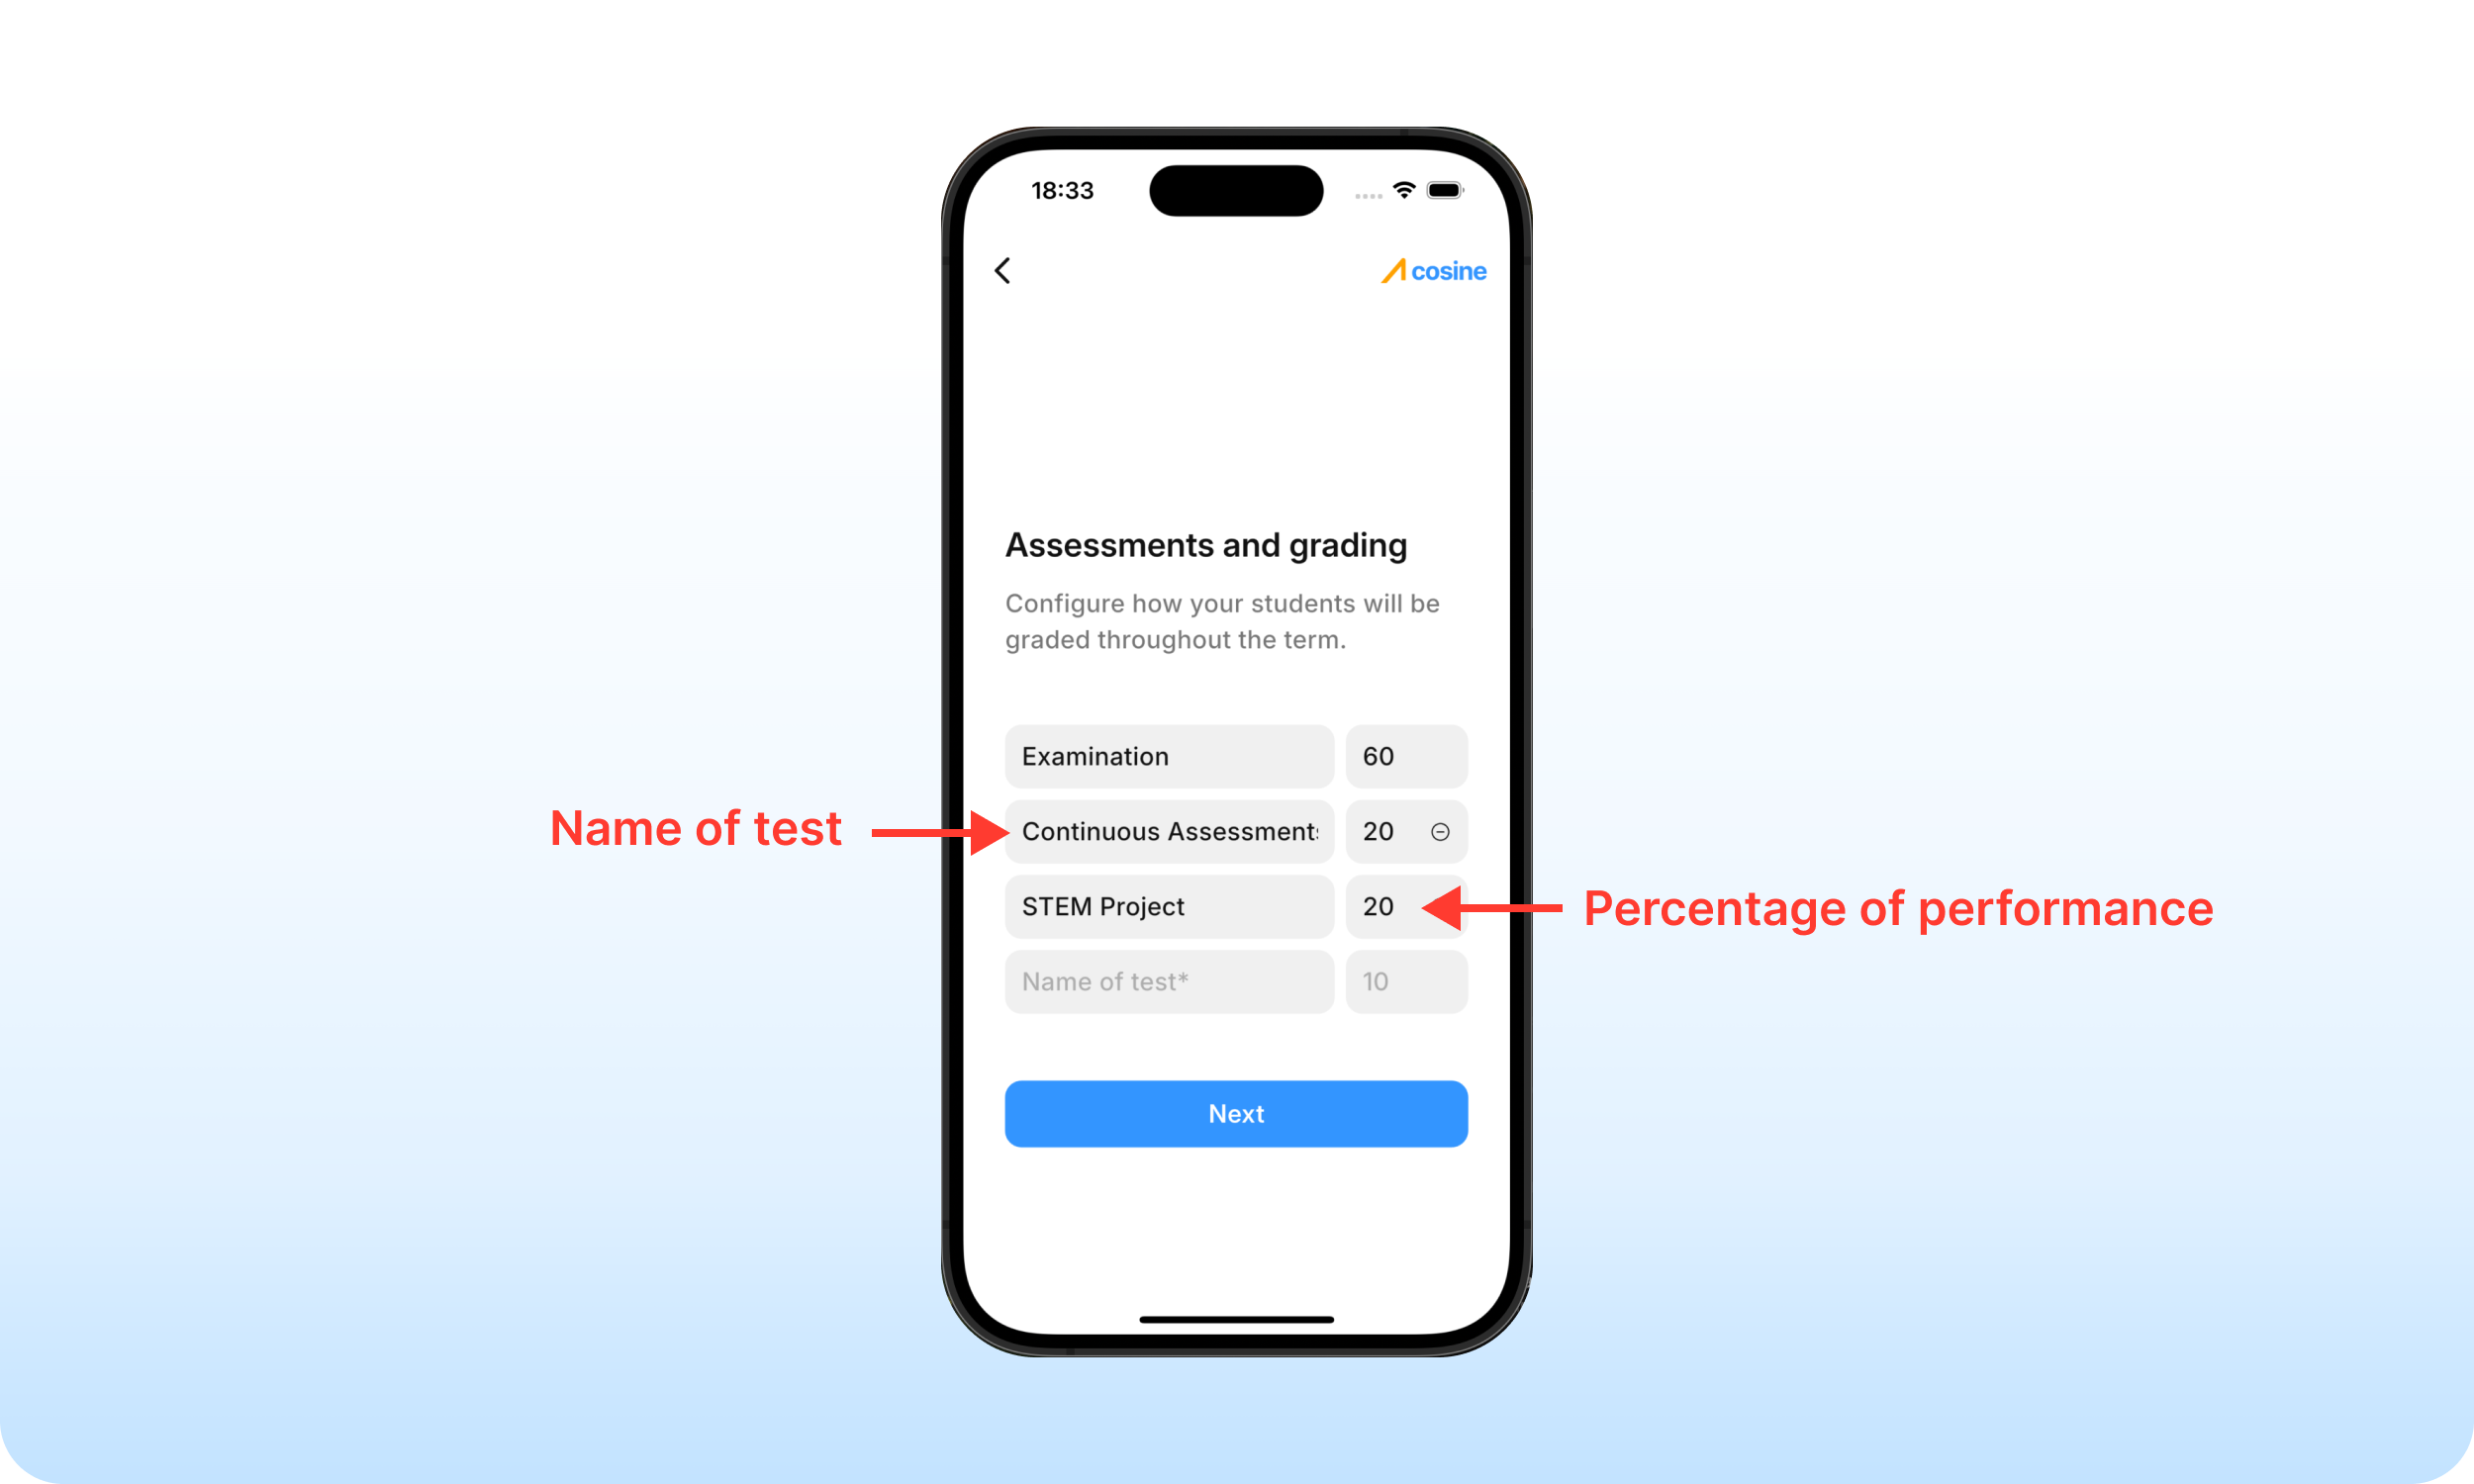
Configuring assessments and grading system#
The final step in creating your school is to configure how your school assesses students.
To complete this step, add the tests conducted in your school. Also, specify –in percentage– how each test contributes to students’ overall performance reporting.
Consider spelling out test configurations in full (e.g. Continuous Assessment) as opposed to acronyms (e.g. CA). While this has no effect on the app’s functionality, it may help provide clarity to parents when reading student performance reports.
On the assessment configuration screen, you’ll notice that Examination is pre-added by default.
Do not add another instance of “Examination” or “Exam.” Doing this may affect analytics and it could certainly confuse your staff and parents.
At the end of each academic term, this configuration will be used to compute the report cards of students in your school. So, we recommend adding only test configurations that are essential to report card generation.
What happens next?#
Once your school’s assessments are configured, you will be redirected to the dashboard. Your school is fully created.
Next, you can start enrolling students into your classrooms.
We recommend enrolling students before adding staff members. This helps ensure that teachers are not added into empty classrooms. Once again, this has no effect on the app’s functionality.